Lab-5-3
(3.33 % of the course mark)
Fuzz Testing
- This lab introduces fuzz testing using OWASP ZAP, a security testing tool. Participants will learn how to configure and execute fuzzing attacks to identify vulnerabilities such as SQL injection, XSS, and buffer overflows in web applications.
Lab objectives
-
Understand the fundamentals of fuzz testing and its role in security testing.
-
Configure and run fuzzing tests using OWASP ZAP.
-
Identify and analyze vulnerabilities exposed through fuzzing.
-
Interpret ZAP's results to improve application security.
Setup and execute Bank-App
-
Download and extract the file Lab-5-1.zip.
-
Open Visual Studio Code and open the folder of the directory where the folders and files were extracted. Navigate to the folder named Bank-App.
-
Open the terminal and ensure that you are on the root folder of Bank-App.
-
Type the following commands and press enter:
npm install
npm run start
FUZZ Testing with ZAP
-
Open ZAP.
-
Click on Manual Explore.
-
Choose the following settings and click on Launch Browser:

-
Close the previously opened Chrome browser.
-
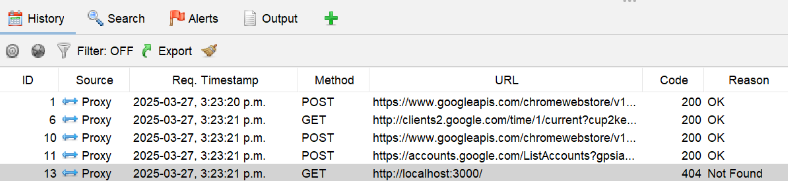
Click on the History tab and highlight the request with the URL: http://localhost:3000.
-
Right click on the highlighted request and choose Open/Resend with Request Editor.
-
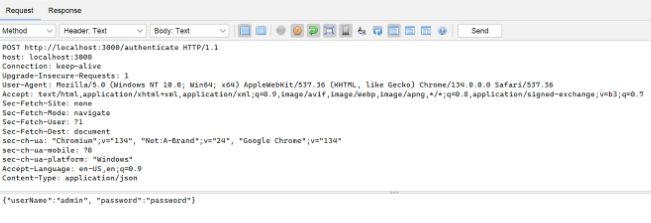
On the top section of the Request Editor, enter the following text:
POST http://localhost:3000/authenticate HTTP/1.1
host: localhost:3000
Connection: keep-alive
Upgrade-Insecure-Requests: 1
User-Agent: Mozilla/5.0 (Windows NT 10.0; Win64; x64) AppleWebKit/537.36 (KHTML, like Gecko) Chrome/134.0.0.0 Safari/537.36
Accept: text/html,application/xhtml+xml,application/xml;q=0.9,image/avif,image/webp,image/apng,*/*;q=0.8,application/signed-exchange;v=b3;q=0.7
Sec-Fetch-Site: none
Sec-Fetch-Mode: navigate
Sec-Fetch-User: ?1
Sec-Fetch-Dest: document
sec-ch-ua: "Chromium";v="134", "Not:A-Brand";v="24", "Google Chrome";v="134"
sec-ch-ua-mobile: ?0
sec-ch-ua-platform: "Windows"
Accept-Language: en-US,en;q=0.9
Content-Type: application/json
- On the bottom section of the Request Editor, enter the following text:
{"userName":"admin", "password":"password"}
- It should look similar to the screenshot below:
-
Click on Send.
-
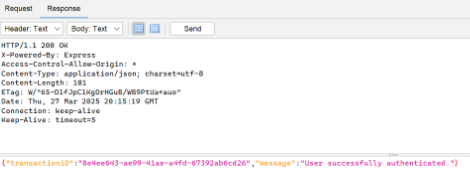
Ensure that the response is similar to the screenshot below:
-
Dismiss the Manual Request Editor dialog.
-
Go back to the History tab, look for the successful request and click on it to highlight. It should look similar to the screenshot below.

-
Right click on the successful request and choose Attack > Active Scan.
-
Click on Start Scan.
-
Go back to the History tab and look for any Bad request, similar to the screenshot below.

-
Right click on the highlighted failed request and choose Open/Resend with Request Editor. This should show the bad payload that was sent as part of the testing.
-
Take a screenshot of the Manual Request Editor and name it zap.png.
-
Create a report by clicking on Report > Generate Report …
-
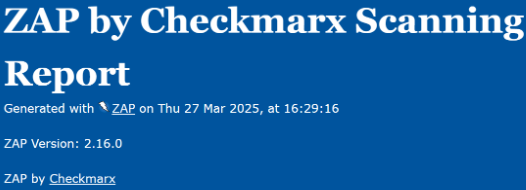
On the list of sites, click on http://localhost:3000 and click on Generate Report.
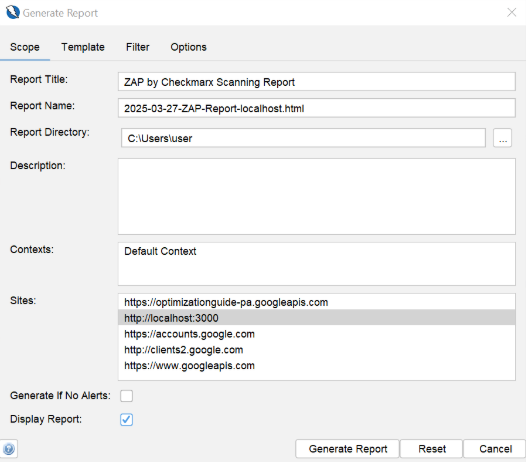
- This should produce a report.
Submission
-
Create a folder named submit.
-
Copy the screenshot zap.png and the generated html report to this folder.
-
Create a zip file of this folder.
-
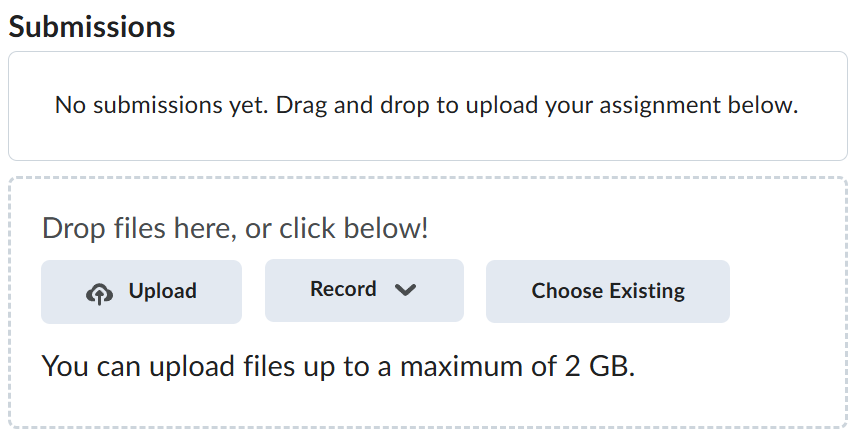
Navigate back to where the lab was originally downloaded, there should be a Submissions section (see below) where the zip file can be uploaded.