Lab-4-1
(10 % of the course mark)
Advanced API Testing
- This lab focuses on advanced API testing techniques using Postman, including complex workflows, data manipulation, and automated validation. You will work through real-world scenarios involving API chaining, batch operations, dynamic variables, and error handling.
Lab objectives
-
Extract and reuse dynamic data across multiple requests using Postman variables.
-
Test bulk data operations ie: bulk create and delete and validate responses.
-
Use scripts to dynamically assert complex nested JSON structures and response patterns.
-
Ensure APIs handle duplicate requests safely and validate concurrent execution scenarios.
-
Execute complex workflows by chaining requests using the Postman Collection Runner.
Setup and execute Express-Api-App
-
Download and extract the file Lab-4-1.zip.
-
Open Visual Studio Code and open the folder of the directory where the folders and files were extracted. Navigate to the folder named Express-Api-App.
-
Open the terminal and ensure that you are on the root folder of Express-Api-App.
-
Type the following commands and press enter:
npm install
npm run start
Ensure that you have a Postman account and are logged in before continuing to the next step. To log in, click the Sign In button at the top of the Postman app and enter your Postman username and password.
Postman Testing - Create a Single User
-
Open Postman and click on New > HTTP Request.
-
Change the method to POST and set the url to localhost:3000/users/create.

- Click on the Body tab and choose raw and select JSON.

- On the request text box enter the following text below:
{
  "USER_NAME": "bill.gates",
  "EMAIL": "bill.gates@microsoft.com",
  "PASSWORD": "password"
}
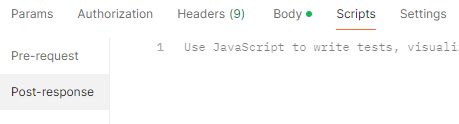
- Click on the Scripts tab > Post-response and enter the following code:
pm.test("Status code is 200", () => {
  pm.response.to.have.status(200);
});

pm.test("Validate response", () => {
  const jsonData = pm.response.json();
  pm.expect(jsonData.status).to.equal("success");
});
- Click on Send to execute the test. This result of the test should be successful, verify the results by clicking on the Body and Test Results tabs of the Response section.

-
Take a screenshot of the Body and Test Results tabs and name it create-user-body-success.png and create-user-test-results-success.png.
-
Click on Send to execute the test once again. Because the user has been created in the previous step, the result of the test should have some errors, verify the results by clicking on the Body and Test Results tabs of the Response section.
-
Take a screenshot of the Body and Test Results tabs and name it create-user-body-failure.png and create-user-test-results-failure.png.
Postman Testing - Delete a Single User
-
Open Postman and click on New > HTTP Request.
-
Change the method to DELETE and set the url to localhost:3000/users/delete/1.
-
Click on the Scripts tab > Post-response and enter the following code:
pm.test("Status code is 200", () => {
  pm.response.to.have.status(200);
});

pm.test("Validate response", () => {
  const jsonData = pm.response.json();
  pm.expect(jsonData.status).to.equal("success");
  pm.expect(jsonData.message).to.equal("Successfully deleted 1 users.");
});
-
Click on Send to execute the test. This result of the test should be successful, verify the results by clicking on the Body and Test Results tabs of the Response section.
-
Take a screenshot of the Body and Test Results tabs and name it delete-user-body-success.png and delete-user-test-results-success.png.
-
Click on Send to execute the test once again. Because the user has been deleted in the previous step, the result of the test should have some errors, verify the results by clicking on the Body and Test Results tabs of the Response section.
-
Take a screenshot of the Body and Test Results tabs and name it delete-user-body-failure.png and delete-user-test-results-failure.png.
Postman Testing - Create Multiple Users
-
Open Postman and click on New > HTTP Request.
-
Change the method to POST and set the url to localhost:3000/users/create/bulk.
-
Click on the Body tab and choose raw and select JSON.
-
On the request text box enter the following text below:
[
  {
    "USER_NAME": "bill.gates",
    "EMAIL": "bill.gates@microsoft.com",
    "PASSWORD": "password"
  },
  {
    "USER_NAME": "steve.jobs",
    "EMAIL": "steve.jobs@apple.com",
    "PASSWORD": "password"
  },
  {
    "USER_NAME": "elon.musk",
    "EMAIL": "elon.musk@tesla.com",
    "PASSWORD": "password"
  },
  {
    "USER_NAME": "jeff.bezos",
    "EMAIL": "jeff.bezos@amazon.com",
    "PASSWORD": "password"
  },
  {
    "USER_NAME": "mark.zuckerberg",
    "EMAIL": "mark.zuckerberg@meta.com",
    "PASSWORD": "password"
  },
  {
    "USER_NAME": "larry.page",
    "EMAIL": "larry.page@google.com",
    "PASSWORD": "password"
  },
  {
    "USER_NAME": "sundar.pichai",
    "EMAIL": "sundar.pichai@google.com",
    "PASSWORD": "password"
  },
  {
    "USER_NAME": "tim.cook",
    "EMAIL": "tim.cook@apple.com",
    "PASSWORD": "password"
  },
  {
    "USER_NAME": "satya.nadella",
    "EMAIL": "satya.nadella@microsoft.com",
    "PASSWORD": "password"
  },
  {
    "USER_NAME": "jack.ma",
    "EMAIL": "jack.ma@alibaba.com",
    "PASSWORD": "password"
  }
]
- Click on the Scripts tab > Post-response and enter the following code:
pm.test("Status code is 200", () => {
  pm.response.to.have.status(200);
});

pm.test("Validate response", () => {
  const jsonData = pm.response.json();
  pm.expect(jsonData.status).to.equal("success");
  pm.expect(jsonData.insertStatuses).to.be.an("array").with.length(10);
});
-
Click on Send to execute the test. This result of the test should be successful and create 10 users, verify the results by clicking on the Body and Test Results tabs of the Response section.
-
Take a screenshot of the Body and Test Results tabs and name it create-users-body-success.png and create-users-test-results-success.png.
-
Click on Send to execute the test once again. Because the list of users has been created in the previous step, the result of the test should have some errors, verify the results by clicking on the Body and Test Results tabs of the Response section.
-
Take a screenshot of the Body and Test Results tabs and name it create-users-body-failure.png and create-users-test-results-failure.png.
Postman Testing - Delete Multiple Users
-
Open Postman and click on New > HTTP Request.
-
Change the method to DELETE and set the this url to localhost:3000/users/delete.
-
Click on the Scripts tab > Post-response and enter the following code:
pm.test("Status code is 200", () => {
  pm.response.to.have.status(200);
});

pm.test("Validate response", () => {
  const jsonData = pm.response.json();
  pm.expect(jsonData.status).to.equal("success");
  pm.expect(jsonData.message).to.equal("Successfully deleted 10 users.");
});
-
Click on Send to execute the test. This result of the test should be successful, verify the results by clicking on the Body and Test Results tabs of the Response section.
-
Take a screenshot of the Body and Test Results tabs and name it delete-users-body-success.png and delete-users-test-results-success.png.
-
Click on Send to execute the test once again. Because the user has been deleted in the previous step, the result of the test should have some errors, verify the results by clicking on the Body and Test Results tabs of the Response section.
-
Take a screenshot of the Body and Test Results tabs and name it delete-users-body-failure.png and delete-users-test-results-failure.png.
Postman Testing API Chaining Via Collection
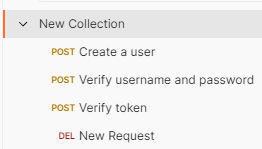
- The API chain consists of the following tasks in sequence: create user, verify username and password, verify token and delete user.
- Open Postman, click on the Collections icon.

-
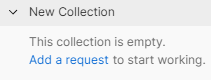
Click on the + icon to create a Blank collection.
-
Click on Add a request to create a new request.
-
Set the request name as: Create a user.
-
Set the request with the following settings:
-
Method: POST
-
Url: localhost:3000/users/create
-
Body tab: Set to raw and JSON. Copy the json contents below:
-
{
  "USER_NAME": "bill.gates",
  "EMAIL": "bill.gates@microsoft.com",
  "PASSWORD": "password"
}
- Scripts tab > Post-response: Copy the code below:
const response = pm.response.json();
pm.environment.set("id", response.id);
pm.environment.set("userName", "bill.gates");
pm.environment.set("password", "password");
-
Save the changes to the request by clicking on the Save button.
-
Click on the three dots beside New Collection and click on Add request.

-
Set the request name as: Verify username and password.
-
Set the request with the following settings:
-
Method: POST
-
Url: localhost:3000/users/verifyUsernameAndPassword
-
Body tab: Set to raw and JSON. Copy the json contents below:
-
{ "userName": "{{userName}}", "password": "{{password}}" }
- Scripts tab > Post-response: Copy the code below:
pm.test("Validate response", () => {
  const response = pm.response.json();
  pm.expect(response.status).to.equal("success");
  pm.expect(response.message).to.equal(
    "Username and password was successfully verified."
  );
  pm.environment.set("token", response.token);
});
-
Save the changes to the request by clicking on the Save button.
-
Click on the three dots beside New Collection and click on Add request.
-
Set the request name as: Verify token.
-
Set the request with the following settings:
-
Method: POST
-
Url: localhost:3000/users/verifyToken
-
Body tab: Set to raw and JSON. Copy the json contents below:
-
{ "token": "{{token}}" }
- Scripts tab > Post-response: Copy the code below:
pm.test("Validate response", () => {
  const response = pm.response.json();
  pm.expect(response.message).to.equal("Token successfully verified.");
});
-
Save the changes to the request by clicking on the Save button.
-
Click on the three dots beside New Collection and click on Add request.
-
Set the request name as: Delete a user.
-
Set the request with the following settings:
-
Method: DELETE
-
Url: localhost:3000/users/delete/{{id}}
-
Scripts tab > Post-response: Copy the code below:
-
pm.test("Validate response", () => {
  const jsonData = pm.response.json();
  pm.expect(jsonData.status).to.equal("success");
  pm.expect(jsonData.message).to.equal("Successfully deleted 1 users.");
});
-
Save the changes to the request by clicking on the Save button.
-
Ensure that the following requests are created.
-
Click on the three dots beside New Collection and click on Run.
-
Accept the defaults and click on Run New Collection.

- Take a screenshot of the result and name it api-chain-test.png.
Submission
-
Create a folder named submit.
-
Copy all (create-user-body-success.png, create-user-test-results-success.png, create-user-body-failure.png, create-user-test-results-failure.png, delete-user-body-success.png, delete-user-test-results-success.png, delete-user-body-failure.png, delete-user-test-results-failure.png, create-users-body-success.png, create-users-test-results-success.png, create-users-body-failure.png, create-users-test-results-failure.png, delete-users-body-success.png, delete-users-test-results-success.png, delete-users-body-failure.png, delete-users-test-results-failure.png and api-chain-test.png) the previously saved screenshots to this folder.
-
Create a zip file of this folder.
-
Navigate back to where the lab was originally downloaded, there should be a Submissions section (see below) where the zip file can be uploaded.