Lab-1-1
(10 % of the course mark)
Testing Automation using Selenium
- This lab provides hands-on experience with Selenium WebDriver, a powerful automation tool for web application testing. Participants will learn to write, execute, and debug automated test scripts using Selenium, integrate it with testing frameworks like Jest, and interact with web elements dynamically. The lab covers key concepts such as browser interactions.
Lab objectives
-
Automate web application testing using Selenium WebDriver.
-
Identify and use different locators (ID, XPath, CSS Selector).
-
Implement waits for handling dynamic elements.
-
Perform form interactions (input fields, buttons, checkboxes, dropdowns).
-
Integrate Selenium with Jest for structured test execution and reporting.
-
Debug and maintain automation scripts effectively.
Setup and execute Test-App
-
Download and extract the file Lab-1-1.zip.
-
Open Visual Studio Code and open the folder of the directory where the folders and files were extracted.
-
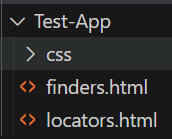
Expand the Test-App folder and look for the files: finders.html and locators.html.
-
Right click on finders.html and click on Open with Live Server. This should open the finders.html app.
-
Right click on locators.html and click on Open with Live Server. The should open the locators.html app.
Selenium Node.js Setup
-
Open Visual Studio Code, create a folder named Selenium-App.
-
Open the terminal and change the directory to Selenium-App.
-
Initialize the app by typing the command below and press enter.
npm init -y
- Install the following npm packages by typing the list of commands below on the terminal:
npm install selenium
npm install selenium-webdriver
npm install jest
- Modify package.json and add the following settings below:
  "scripts": {
    "test": "jest"
  },
  "jest": {
    "testTimeout": 30000
  },
Locator strategies
- Selenium has many ways to identify one or more specific elements in the DOM. It can find by class name, css selector, id, name, link text, and xpath.
- Inside the Selenium-App folder create a file named: locators.js and copy the code below:
const { Builder, Browser, By, locateWith } = require("selenium-webdriver");

(async () => {
  const GREEN = "\x1b[32m%s\x1b[0m";
  const URL = `http://127.0.0.1:5500/Test-App/locators.html`;
  const PRE_TEXT = `Finding element via element`;

  // Using the WebDriver create an instance of the Chrome browser
  let driver = await new Builder().forBrowser(Browser.CHROME).build();

  // Using the WebDriver, navigate to a website using the url
  await driver.get(URL);
  console.log(GREEN, `Navigate to: ${URL}.`);

  // Using class name
  const findByClassName = await driver.findElement(By.className("information"));
  console.log(GREEN, `${PRE_TEXT} class name.`);

  // Using css selector
  const findByCssSelector = await driver.findElement(By.css("#fname"));
  console.log(GREEN, `${PRE_TEXT} css selector.`);

  // Using id
  const findById = await driver.findElement(By.id("lname"));
  console.log(GREEN, `${PRE_TEXT} id.`);

  // Using name
  const findByName = await driver.findElement(By.name("newsletter"));
  console.log(GREEN, `${PRE_TEXT} name.`);

  // Using link text
  const findByLinkText = await driver.findElement(
    By.linkText("Selenium Official Page")
  );
  console.log(GREEN, `${PRE_TEXT} link text.`);

  // Using partial link text
  const findByPartialLinkText = await driver.findElement(
    By.partialLinkText("Official Page")
  );
  console.log(GREEN, `${PRE_TEXT} partial link text.`);

  // Using xpath
  const findByXpath = await driver.findElement(By.xpath("//input[@value='f']"));
  console.log(GREEN, `${PRE_TEXT} xpath.`);

  // Using chaining
  // Find the form
  const formElement = await driver.findElement(By.css("form"));

  // Using the form element find the submit button
  const submitElement = await formElement.findElement(
    By.css('input[type="submit"]')
  );
  console.log(GREEN, `${PRE_TEXT} chaining.`);

  // Using relative
  // We are looking an input element above the element with id = lname
  let fnameInputElement = locateWith(By.css("input")).above(By.id("lname"));
  console.log(GREEN, `${PRE_TEXT} relative above.`);

  // We are looking an input element below the element with id = fname
  let lnameInputElement = locateWith(By.css("input")).below(By.id("fname"));
  console.log(GREEN, `${PRE_TEXT} relative below.`);

  // We are looking an radio element on the right side of an element with id = male
  let femaleRadioElement = locateWith(By.css("radio")).toRightOf(By.id("male"));
  console.log(GREEN, `${PRE_TEXT} relative to the right.`);

  // We are looking an radio element on the left side of an element with id = female
  let maleRadioElement = locateWith(By.css("radio")).toLeftOf(By.id("female"));
  console.log(GREEN, `${PRE_TEXT} relative to the left.`);

  await driver.quit();
})();
- Ensure that Live Server is active and the locators.html file is accessible via: http://127.0.0.1:5500/Test-App/locators.html. If not review the instructions on Setup and execute Test-App.
-
On the command line type: node locators.js and press enter. This js file demonstrates ways to identify one or more specific elements in the DOM of the locators.html.
-
Take a screenshot of the results on the command line and name it locators.png.
- Feel free to modify and experiment with the provided code.
Finding web elements
- Selenium has many ways to locate elements based on the provided locator values. It can find by class name, css selector, id, and name.
- Inside the Selenium-App folder create a file named: finders.js and copy the code below:
const { Builder, Browser, By, locateWith } = require("selenium-webdriver");

(async () => {
  const GREEN = "\x1b[32m%s\x1b[0m";
  const URL = `http://127.0.0.1:5500/Test-App/finders.html`;
  const PRE_TEXT = `Matched element text:`;
  const GOOGLE_URL = `https://www.google.com`;

  // Using the WebDriver create an instance of the Chrome browser
  let driver = await new Builder().forBrowser(Browser.CHROME).build();

  // Using the WebDriver, navigate to a website using the url
  await driver.get(URL);
  console.log(GREEN, `Navigate to: ${URL}.`);

  // This will return the first instance of an element that matches the class name = tomatoes
  const tomatoElement = await driver.findElement(By.className("tomatoes"));
  console.log(GREEN, `${PRE_TEXT} ${await tomatoElement.getText()}.`);

  // This will return an element that has an id = fruits
  const fruitsElement = await driver.findElement(By.id("fruits"));
  // Based on previously matched element, it will return an element that has a class name = tomatoes
  const fruitElement = await fruitsElement.findElement(
    By.className("tomatoes")
  );
  console.log(GREEN, `${PRE_TEXT} ${await fruitElement.getText()}.`);

  // Does the same from above but instead of 2 separate calls this is condensed as one
  const optimizedSearch = await driver.findElement(By.css("#fruits .tomatoes"));
  console.log(GREEN, `${PRE_TEXT} ${await optimizedSearch.getText()}.`);

  // findElements can return one or more elements
  const liElements = await driver.findElements(By.css("li"));

  for (const liElement of liElements) {
    console.log(GREEN, `${PRE_TEXT} ${await liElement.getText()}.`);
  }

  const vegetableElements = await driver.findElement(By.id("vegetables"));
  // findElements can return one or more elements
  const vegetableList = await vegetableElements.findElements(By.css("li"));

  for (const vegetableItem of vegetableList) {
    console.log(GREEN, `${PRE_TEXT} ${await vegetableItem.getText()}.`);
  }

  //  Navigate to google.com, look for the element with the name = q and send the text webElement
  await driver.get(GOOGLE_URL);
  console.log(GREEN, `Navigate to: ${GOOGLE_URL}.`);

  await driver.findElement(By.css('[name="q"]')).sendKeys("webElement");
  console.log(
    GREEN,
    `Matched element [name="q"] and sendKeys the text "webElement".`
  );

  // Get attribute of current active element
  let attribute = await driver.switchTo().activeElement().getAttribute("title");
  console.log(
    GREEN,
    `Switching to the active element and getting the attribute: ${attribute}.`
  );

  await driver.quit();
})();
- Ensure that Live Server is active and the finders.html file is accessible via: http://127.0.0.1:5500/Test-App/finders.html. If not review the instructions on Setup and execute Test-App.
-
On the command line type: node finders.js and press enter. This js file demonstrates locating the elements based on the provided locator values.
-
Take a screenshot of the results on the command line and name it finders.png.
- Feel free to modify and experiment with the provided code.
Information about web elements
- Selenium have number of details you can query about a specific element. Selenium has a function to verify it the element is visible, to verify if the element is visible, to get a specific tag, element attribute and text.
- Inside the Selenium-App folder create a file named: information.js and copy the code below:
const { Builder, Browser, By, locateWith } = require("selenium-webdriver");

(async () => {
  const GREEN = "\x1b[32m%s\x1b[0m";
  const URL = `http://127.0.0.1:5500/Test-App/locators.html`;

  // Using the WebDriver create an instance of the Chrome browser
  let driver = await new Builder().forBrowser(Browser.CHROME).build();

  // Using the WebDriver, navigate to a website using the url
  await driver.get(URL);
  console.log(GREEN, `Navigate to: ${URL}.`);

  // isDisplayed() function
  let result = await driver.findElement(By.name("gender")).isDisplayed();
  console.log(
    GREEN,
    `Looking for the gender element and checking isDisplayed(): ${result}.`
  );

  // isDisplayed() function
  result = await driver.findElement(By.name("gender")).isEnabled();
  console.log(
    GREEN,
    `Looking for the gender element and checking isDisplayed(): ${result}.`
  );

  // isSelected() function
  result = await driver.findElement(By.name("gender")).isSelected();
  console.log(
    GREEN,
    `Looking for the gender element and checking isSelected(): ${result}.`
  );

  // getTagName() function
  result = await driver.findElement(By.name("gender")).getTagName();
  console.log(
    GREEN,
    `Looking for the gender element and checking getTagName(): ${result}.`
  );

  // getRect() function
  result = await driver.findElement(By.name("gender")).getRect();
  console.log(
    GREEN,
    `Looking for the gender element and checking getRect(): ${JSON.stringify(
      result
    )}.`
  );

  // getText() function
  result = await driver
    .findElement(By.css("[href='www.selenium.dev']"))
    .getText();
  console.log(
    GREEN,
    `Looking for the href='www.selenium.dev' element and checking getText(): ${result}.`
  );

  // getAttribute function
  result = await driver.findElement(By.name("gender")).getAttribute("type");
  console.log(
    GREEN,
    `Looking for the href='www.selenium.dev' element and checking getAttribute("type"): ${result}.`
  );

  await driver.quit();
})();
- Ensure that Live Server is active and the locators.html file is accessible via: http://127.0.0.1:5500/Test-App/locators.html. If not review the instructions on Setup and execute Test-App.
-
On the command line type: node information.js and press enter. This js file demonstrates some of the details you can query about a specific element.
-
Take a screenshot of the results on the command line and name it information.png.
- Feel free to modify and experiment with the provided code.
Interacting with web elements
- Selenium has a set of high-level instruction for manipulating form controls. It has a function to select an element by visible text, by value, and the index of the element, it can interact with an element by clicking or sending key strokes.
- Inside the Selenium-App folder create a file named: interactions.js and copy the code below:
const fs = require("fs");
const {
  Builder,
  Browser,
  By,
  locateWith,
  until,
  Select,
} = require("selenium-webdriver");

(async () => {
  const GREEN = "\x1b[32m%s\x1b[0m";
  const URL = `http://127.0.0.1:5500/Test-App/locators.html`;

  // Using the WebDriver create an instance of the Chrome browser
  let driver = await new Builder().forBrowser(Browser.CHROME).build();

  // Using the WebDriver, navigate to a website using the url
  await driver.get(URL);
  console.log(GREEN, `Navigate to: ${URL}.`);

  // Look for the radio button element with id = mail and click it
  const maleRadioButton = await driver.findElement(By.id("m"));
  maleRadioButton.click();
  console.log(
    GREEN,
    `Look for the radio button element with id = mail and click it.`
  );

  // Clear the contents of the fname text box and update the value to Hello from Selenium via sendKeys
  const fnameTextInput = await driver.findElement(By.id("fname"));
  fnameTextInput.clear();
  fnameTextInput.sendKeys("Hello from Selenium");
  console.log(
    GREEN,
    `Clear the contents of the fname text box and update the value to Hello from Selenium via sendKeys.`
  );

  const selectSingleElement = await driver.findElement(By.id("country"));
  const selectSingle = new Select(selectSingleElement);
  const canadaOption = await driver.findElement(By.css("option[value=canada]"));
  const mexicoOption = await driver.findElement(By.css("option[value=mexico]"));
  const usaOption = await driver.findElement(By.css("option[value=usa]"));

  await selectSingle.selectByVisibleText("Canada");
  console.log(
    GREEN,
    `Canada option selectByVisibleText status: ${await canadaOption.isSelected()}.`
  );

  await selectSingle.selectByValue("mexico");
  console.log(
    GREEN,
    `Mexico option selectByValue status: ${await mexicoOption.isSelected()}.`
  );

  await selectSingle.selectByIndex(2);
  console.log(
    GREEN,
    `Usa option selectByIndex status: ${await usaOption.isSelected()}.`
  );

  const selectMultipleElement = await driver.findElement(By.id("topic"));
  const selectMultiple = new Select(selectMultipleElement);
  const supportOption = await driver.findElement(
    By.css("option[value=support]")
  );
  const salesOption = await driver.findElement(By.css("option[value=sales]"));
  const feedbackOption = await driver.findElement(
    By.css("option[value=feedback]")
  );

  await selectMultiple.selectByVisibleText("Support");
  console.log(
    GREEN,
    `Support option selectByVisibleText status: ${await supportOption.isSelected()}.`
  );

  await selectMultiple.selectByVisibleText("Sales");
  console.log(
    GREEN,
    `Sales option selectByVisibleText status: ${await salesOption.isSelected()}.`
  );

  await selectMultiple.selectByVisibleText("Feedback");
  console.log(
    GREEN,
    `Feedback option selectByVisibleText status: ${await feedbackOption.isSelected()}.`
  );

  // Add a little delay to be able to capture the screen shot properly
  await driver.wait(until.elementIsVisible(maleRadioButton), 2000);
  const image = await driver.takeScreenshot();
  fs.writeFileSync("interactions-screenshot.png", image, "base64");

  await driver.quit();
})();
- Ensure that Live Server is active and the locators.html file is accessible via: http://127.0.0.1:5500/Test-App/locators.html. If not review the instructions on Setup and execute Test-App.
-
On the command line type: node interactions.js and press enter. This js file demonstrates a high-level instruction set for manipulating form controls. Part of the script also generates a screenshot named: interactions-screenshot.png.
-
Take a screenshot of the results on the command line and name it interactions.png.
- Feel free to modify and experiment with the provided code.
Integrate Selenium with Jest
-
Inside the Selenium-App folder create a folder named test.
-
Inside the test folder create a file named: gbc-coned.test.js and copy the code below:
const fs = require("fs");
const { Builder, By, until } = require("selenium-webdriver");

// Jest test label
describe("GBC Coned Search Test", () => {
  let driver;

  // Jest test start up
  beforeAll(async () => {
    // Load the chrome browser
    driver = await new Builder().forBrowser("chrome").build();
  });

  // Jest test tear down
  afterAll(async () => {
    // Take a screen shot of the session
    const image = await driver.takeScreenshot();
    fs.writeFileSync("gbc-coned-screenshot.test.png", image, "base64");

    // Close the chrome browser
    await driver.quit();
  });

  // Jest test
  test("GBC Coned Search Test - Selenium Script", async () => {
    // Navigate to https://coned.georgebrown.ca
    await driver.get("https://coned.georgebrown.ca");

    // Locate the search box
    const searchBox = await driver.findElement(By.id("gsc-i-id1"));

    // Send the text "COMP 9788" to the search box
    await searchBox.sendKeys("COMP 9788");

    // Locate the submit button
    const submitButton = await driver.findElement(
      By.className("gsc-search-button gsc-search-button-v2")
    );

    // Click on the submit button
    await submitButton.click();

    // Wait until the element below is located
    await driver.wait(
      until.elementsLocated(
        By.className(
          "field field--name-title field--type-string field--label-hidden"
        )
      ),
      5000
    );

    // Look for "Advanced Software Quality Assurance Techniques and Tools" link
    const findByLinkText = await driver.findElement(
      By.partialLinkText(
        "Advanced Software Quality Assurance Techniques and Tools"
      )
    );

    // Click on the located link
    findByLinkText.click();
  });
});
-
On the command line type: npm test and press enter. This should execute Selenium commands using the jest test framework. Part of the script also generates a screenshot named: gbc-coned-screenshot.test.png.
-
Take a screenshot of the results on the command line and name it gbc-coned.test.png.
- Feel free to modify and experiment with the provided code.
Submission
-
Create a folder named submit.
-
Copy all (finders.png, gbc-coned.test.png, gbc-coned-screenshot.test.png, information.png, interactions.png, interactions-screenshot.png, and locators.png) the previously saved screenshots, including the screenshot produced by Selenium to this folder.
-
Create a zip file of this folder.
-
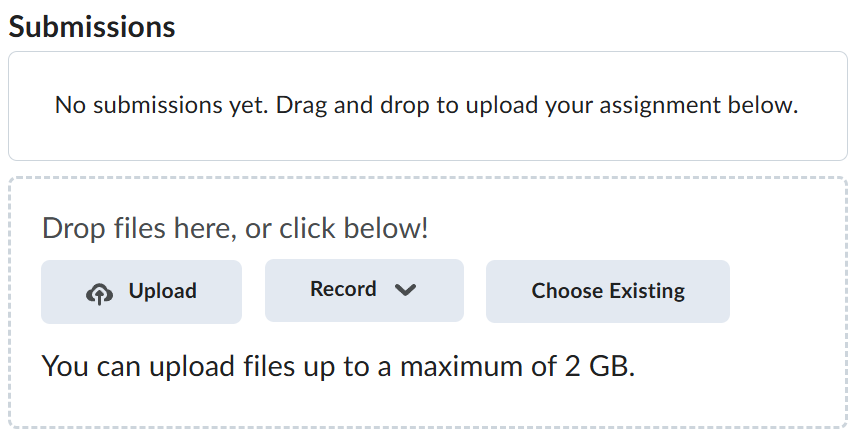
Navigate back to where the lab was originally downloaded, there should be a Submissions section (see below) where the zip file can be uploaded.